
How to Create a ConnectWise API Member for Custom Invoices
Overview
Any tool that reads data from ConnectWise PSA needs an API member: a special account with its own security role and a pair of API keys. Back in 2017 I wrote a short post on setting up public/private API keys. This is the updated version, with the exact permissions we ask for when we set up NexNow Hosted Invoices.
The short version: create a security role with read-only (Inquire) access to only the modules invoices need, create an API member that uses that role, then generate a key pair. It takes about 15 minutes.
Step 1: Create a Security Role
Start with the role so the API member only ever gets the access it needs. Least privilege matters here: an API key never expires on its own, and anyone who has it can do whatever the role allows.
- Go to System > Security Roles and click + to add a new role.
- Give it a clear name, like API – NexNow Invoice Template, and save.
- Open each module listed below and set Inquire Level to All. Leave Add, Edit and Delete at None unless noted.
- Leave every other module at None.
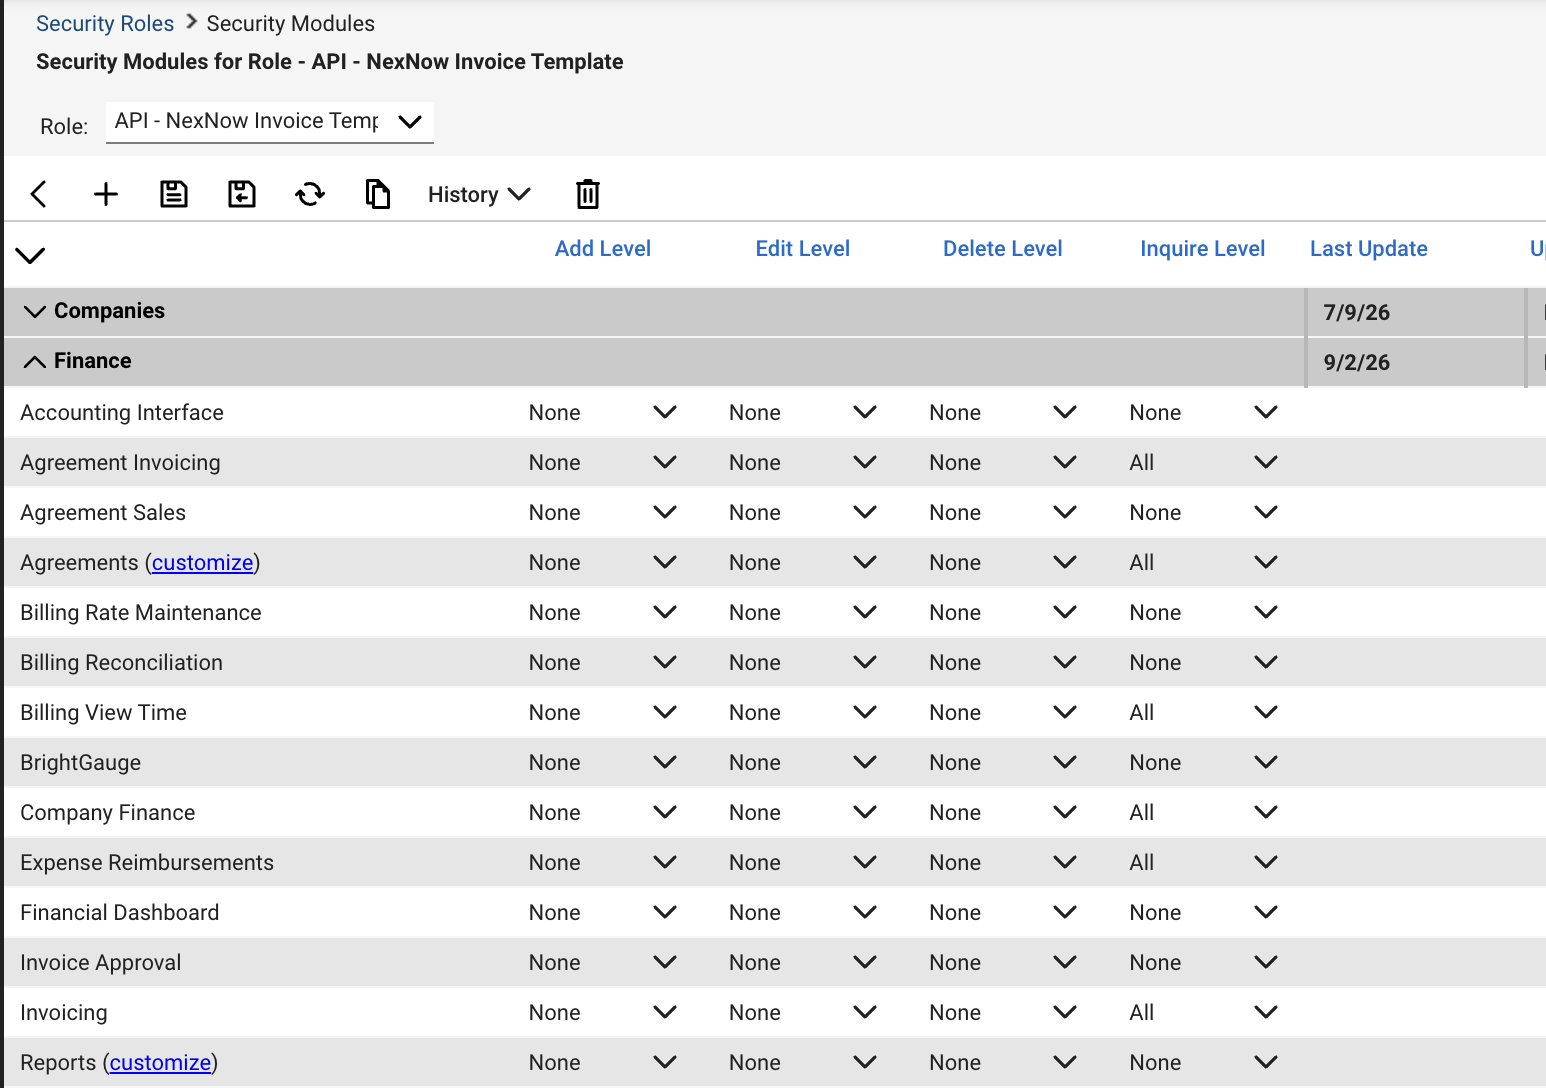
Every module below is set to Inquire: All unless noted.
Required for every invoice
| Section | Module |
|---|---|
| Finance | Invoicing |
| Finance | Agreement Invoicing |
Required if your invoices include this data
Without these, invoices still generate, but the matching section comes out blank. If you’re not sure, grant them. They’re all read-only.
| Section | Module | Needed for |
|---|---|---|
| Finance | Agreements | Agreement details |
| Finance | Billing View Time | Time entry detail |
| Finance | Expense Reimbursements | Expense detail |
| Finance | Company Finance | Custom fields on the company’s Finance tab, if they appear on your invoice |
| Time & Expense | Time Entry | Time entry detail |
| Time & Expense | Expense Report Entry | Expense detail |
| Service Desk | Service Tickets | Ticket details on time entries |
| Project | Project Headers | Project name (skip if you don’t bill through projects) |
| Project | Project Tickets | Project ticket details (skip if you don’t bill through projects) |
| Procurement | Product Catalog | Products, including per-item tax exemptions |
| Procurement | Serial Number Search | Serial numbers on product lines |
| Procurement | Purchase Orders | Serial numbers on product lines |
Optional add-ons
| Section | Module | Needed for |
|---|---|---|
| System | Table Setup: Tax Code | A multi-level tax breakdown (for example, state and county shown separately) |
| Companies | Configurations | Saving each generated PDF back to a configuration record in ConnectWise. Needs Add, Edit, Delete and Inquire: All. |
Apart from the Configurations add-on, everything above is read-only. The invoice process never creates, changes or deletes anything in your ConnectWise.
Using NexNow Reports too? Reports and automations read more of ConnectWise than invoices do (service boards, schedules, members and so on), so they may need more permissions. We’ll tell you exactly which ones for the reports you choose. You can add them to the same role later or create a new role.
Step 2: Create the API Member
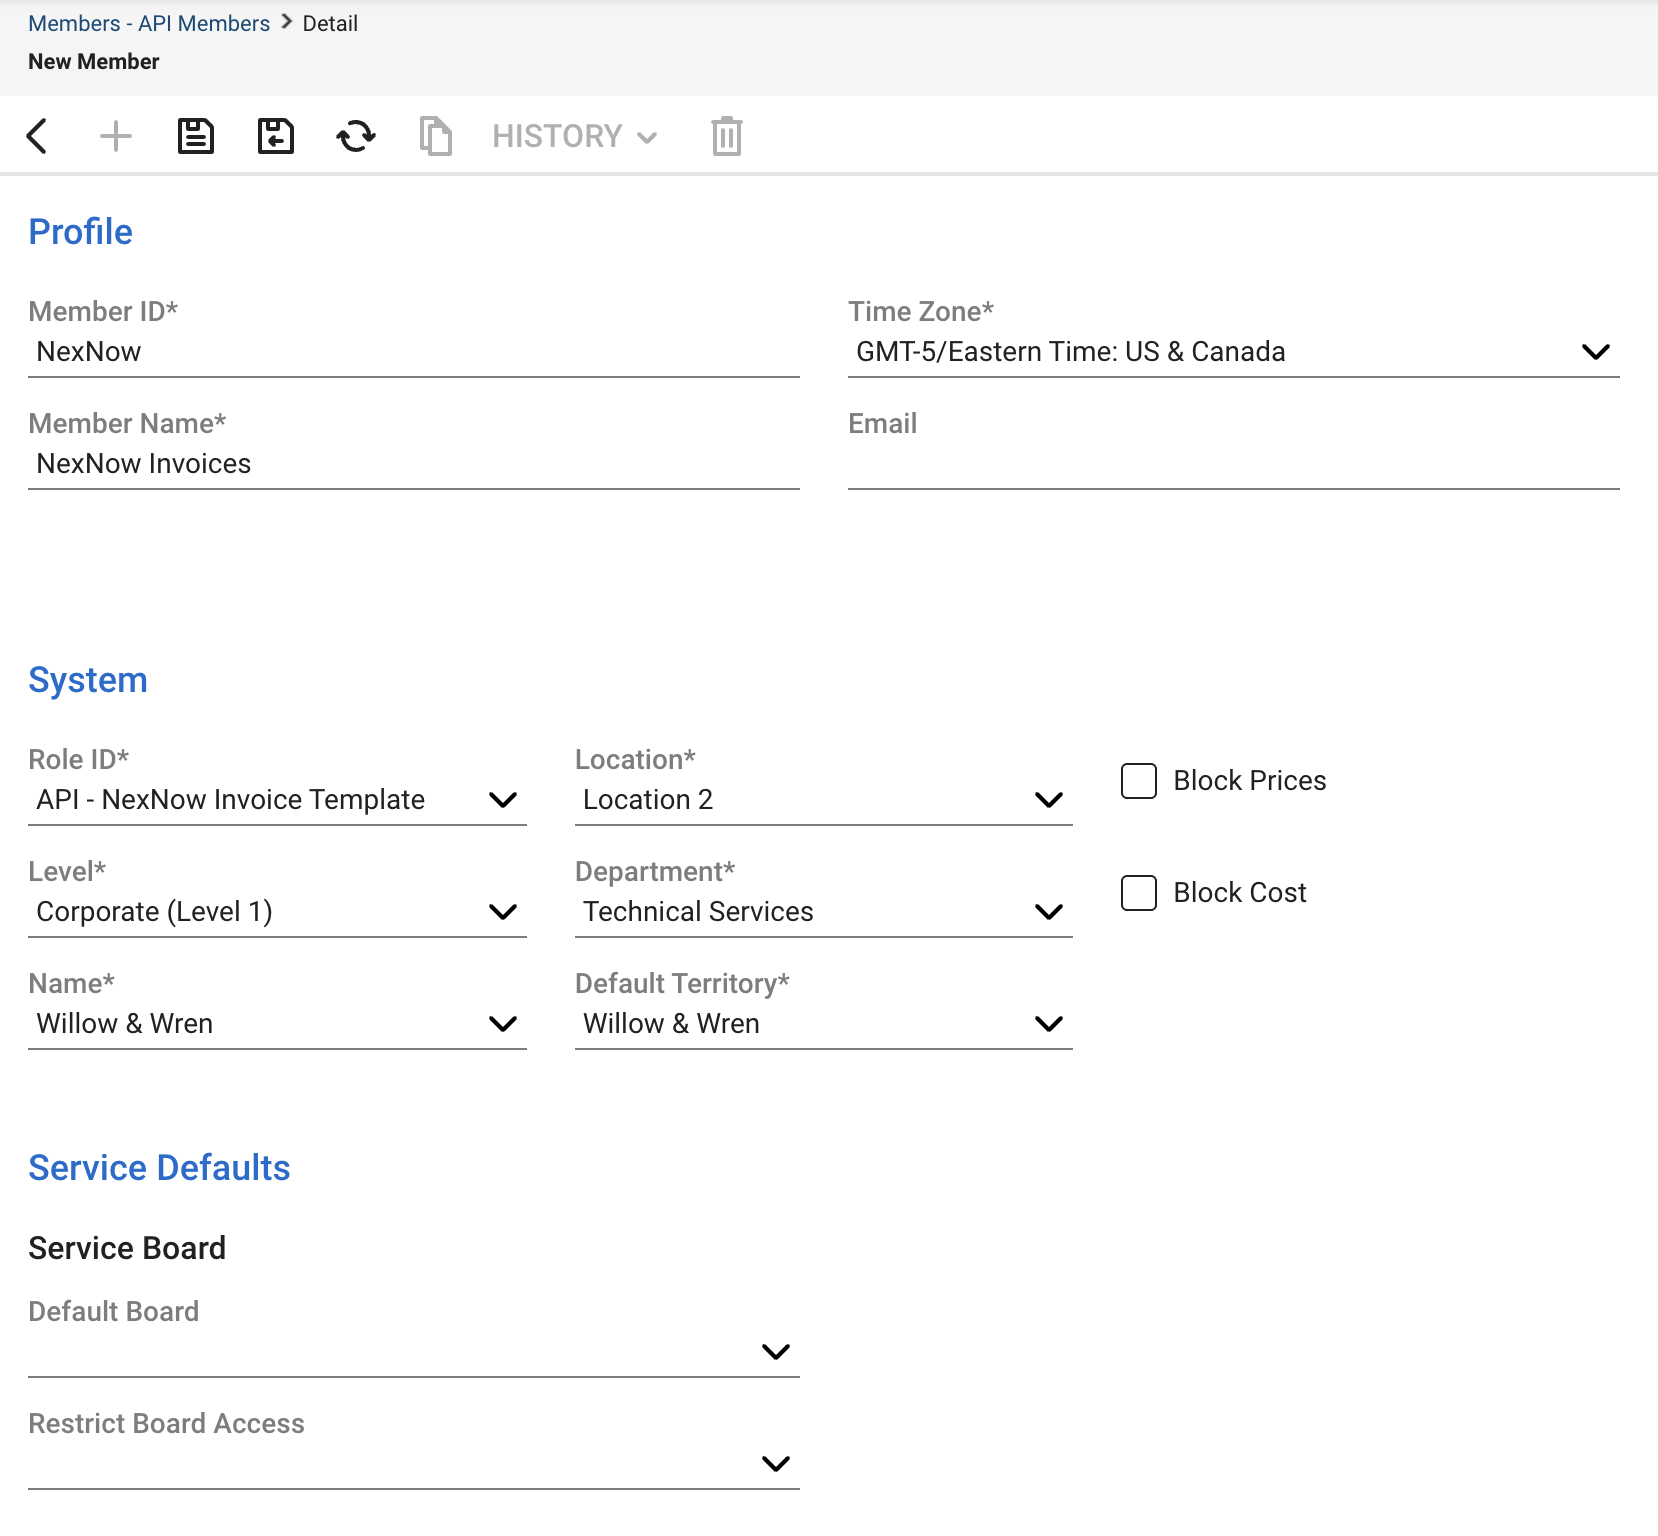
- Go to System > Members, open the API Members tab and click +.
- Fill in the required fields:
- Member ID and Member Name: something recognizable, like NexNow and NexNow Invoices.
- Role ID: the security role you created in Step 1.
- Level and Name: usually Corporate, so the member can see invoices for every location and department.
- Location, Department and Default Territory: any valid defaults.
- Save.
API members don’t use a license, so this doesn’t add to your ConnectWise bill.
Step 3: Generate the API Keys
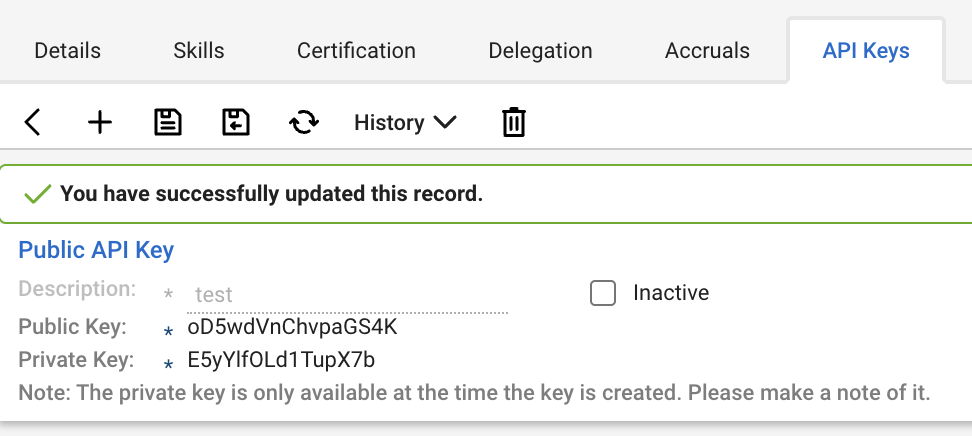
- With the API member open, click the API Keys tab (it appears after the first save).
- Click +, enter a description like NexNow Invoices, and save.
- Copy the Public Key and Private Key right away. The private key is only shown once. If you lose it, delete the key and make a new one.
Step 4: Send Us the Details
We need four things:
- Base URL: the ConnectWise site you log in to, for example na.myconnectwise.net
- Database name: the company ID you enter when you log in, for example mycompany or training
- The public key
- The private key
You can submit them through our website, by encrypted email, or by another secure transfer method you prefer. Please don’t send the private key in a plain email.
Want to see your own invoices in the demo? Send these before our call and we’ll have a live demo ready. Otherwise, we’ll use a sandbox environment.
Troubleshooting
- An invoice fails to generate: check that Invoicing and Agreement Invoicing are set to Inquire: All.
- An invoice generates but a section is blank (time detail, ticket info, project name): the matching module from the second table is probably missing.
- Some invoices work and others don’t: check the API member’s Level. If it’s set below Corporate, invoices outside its location or department are hidden from it.
If you want us to take a look, book a time or contact us.